Setup of the RT-607Ri plus |
  
|
Setup of the RT-607Ri plus |
|
To access the setup of an instrument, select it and then click on the Setup button. Thus, the system will request the access code and then, it will display the functions of the instrument.
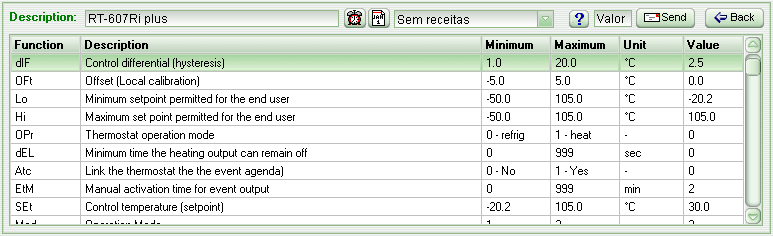
The RT-607Ri plus setup allows you to set all the instrument's functions and control temperature (setpoint).
In order to perform a change, you just have to click on the desired function and type the value in the Value field. Then, click Send, or just press Enter to confirm the function.
Clicking on the help button (blue interrogation) the system shows the description for the selected function.
It is still possible to adjust on the Setup the instrument's functions by sending a preset previously created in the Preset Editor.
In order to synchronize the instrument's timer (clock) according to your computer click on the Synchronize Clock Time to PC button, which icon is a red clock.
The instrument's event schedule can be viewed and changed by clicking on Schedule, and then the Schedule Events form will appear.
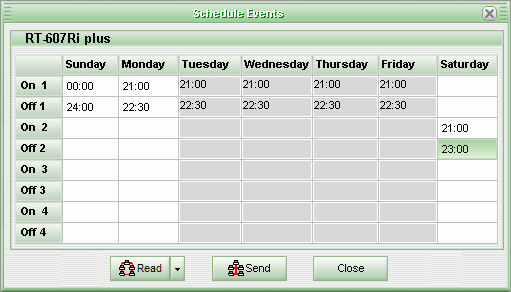
In order to inform or change a programming, click on the cell corresponding to the day of the week and the programming number, and then enter the desired time. The grayed columns are disabled according to the scheduling type defined on the instrument's Mod function.
In order to disable a scheduling you just have to clear the Off field from the respective scheduling. The On field will be disregarded on the scheduling in case the respective Off field is not filled out.
To send the programming to the instrument click the Send button and, to read the instrument schedule, click the Read button.
Clicking on the arrow next to the Read button will open the Read and Read from another instrument options. Clicking on the second option will open the screen to read the agenda of another instrument.
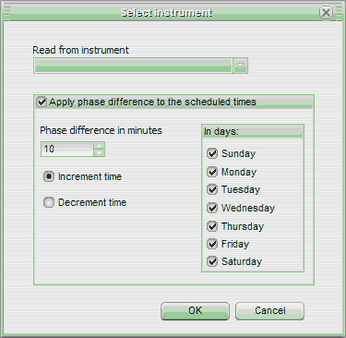
On this screen you will also see options to apply a time lag (in minutes), and to choose the days of the week when the lag on the values read by the other instrument will be applied. Clicking on OK, the schedule of the selected instrument will be read to the time table.
Clicking on the Send button, the weekly schedule of the other instrument will be sent to the current instrument.
See Also
URL of this page